This procedure has been created to help Wayfare employees to work from outside the office (delegations, collaborators, working from home, emergencies, etc.)
How to use VPN and Remote Desktop
VPN is a Virtual Private Network across a public network that benefits from the functionality, security, and management of the Wayfare private network (in our case).
FortiClient is the current VPN application used inside Wayfare, as this is complementary with the firewall equipment FortiGate 100D.
RDC (Remote Desktop Connection) is a client application integrated in Windows Operating Systems which allows a user to remotely connect/log into a network computer running Remote Desktop Services.
1. VPN : Download, Install, Configure, Connect
1.1 Download
Download VPN application FortiClient for your operating system https://www.forticlient.com/downloads

1.2 Install
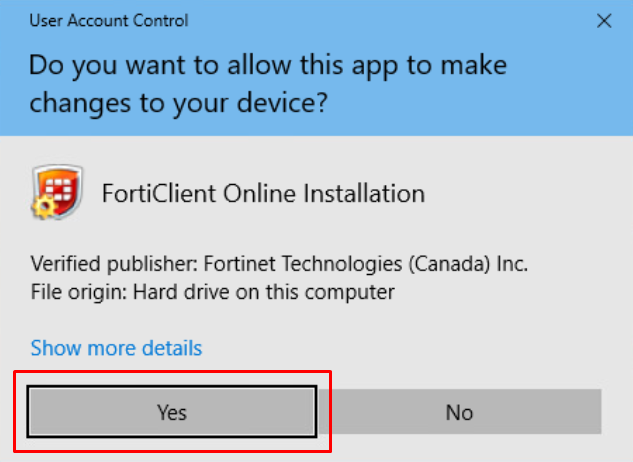
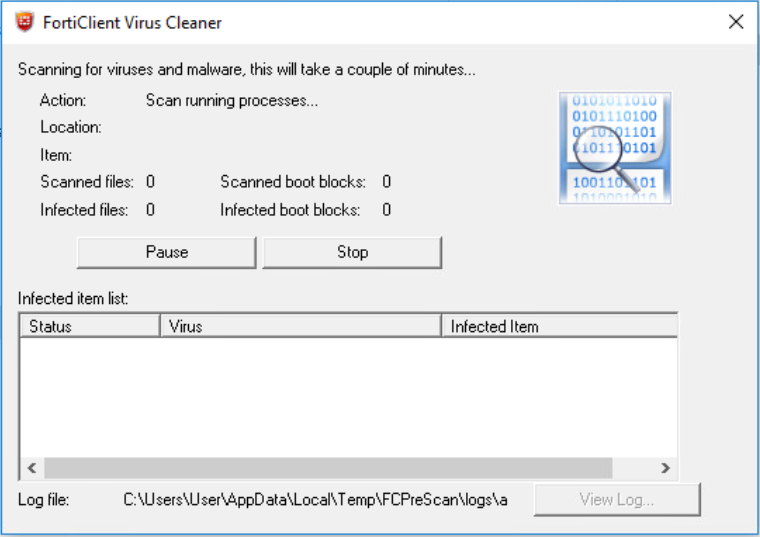
Save and Run or just Run “FortiClientOnlineInstaller.exe” and allow this app to make changes in the UAC window
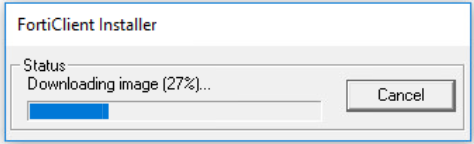
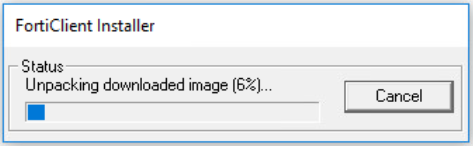
Installation process will finish with a scan for viruses and malware
1.3 Configure
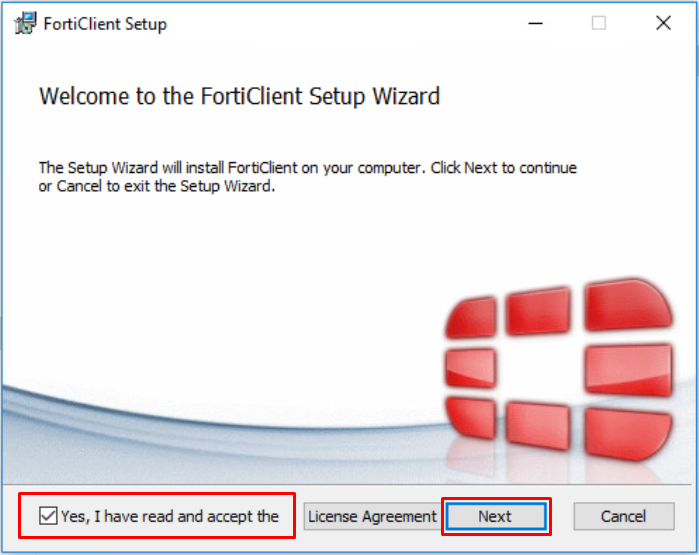
Setup window will pop-up when scan is complete, you need to read and agree the License Agreement and click Next
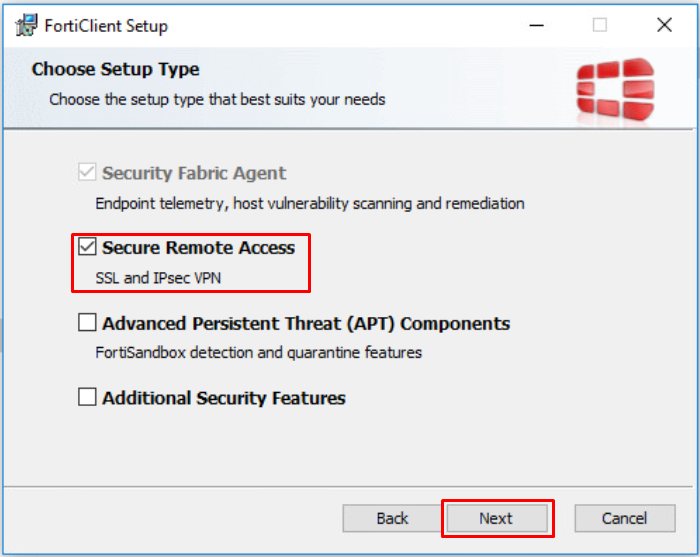
Make sure only Secure Remote Access (SSL and IPsec VPN) is ticked – click Next
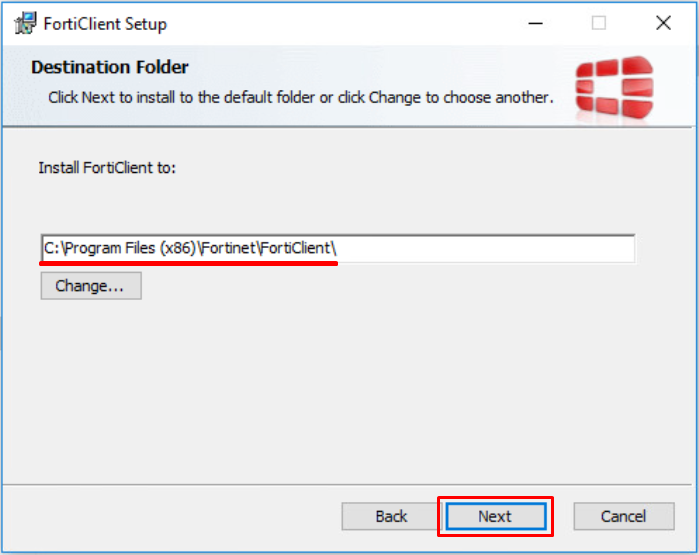
Location of the installation folder and files (no need to change it) – click Next
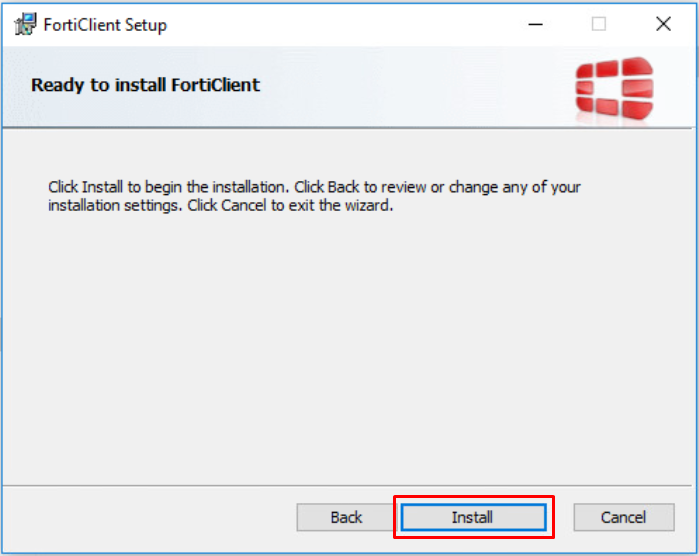
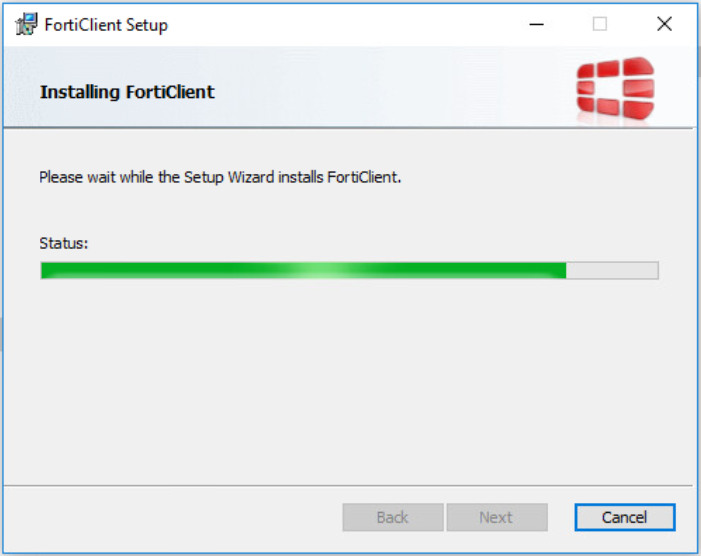
Start the installation process – click Install
Click Finish when the installation is completed
FortiClient will automatically update signatures. You’ll be notified about this and also an update process bar will appear in the bottom right corner.
If the process was successful you’ll find the FortiClient app shortcut on your Desktop and in the right bottom corner of the taskbar where are the hidden icons – click on the Wedge symbol (^).


1.4 Connect
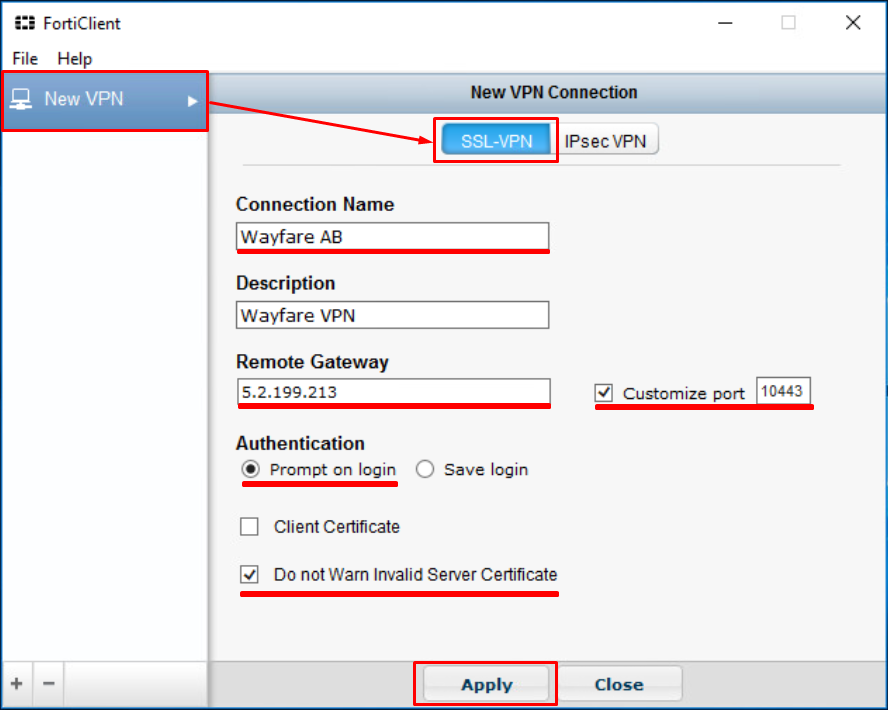
Before you can connect you have to configure the Wayfare VPN connection.
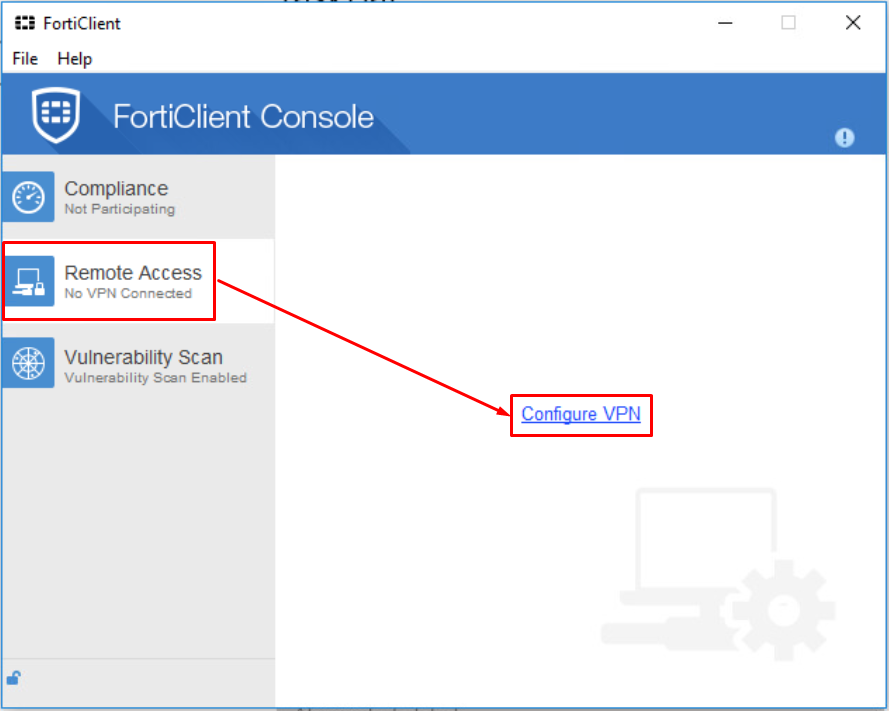
Open FortiClient – click Remote Access – click Configure VPN
Complete the SSL-VPN connection information:
Connection Name –Wayfare AB
Remote Gateway – 5.2.199.213 (Telekom – secondary IPS Remote Gateway: 109.100.235.145)
Customize port – 10443 (tick to amend the port)
Authentication – “Prompt on login” and tick “Do not Warn invalid Server Certificate” àclick Apply and Close.
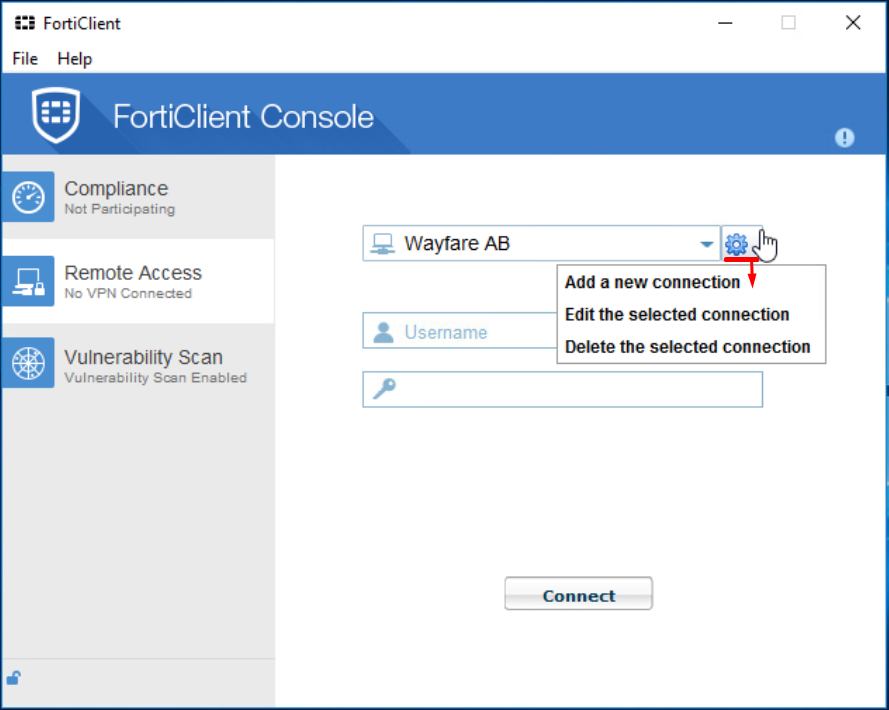
On the main window enter your Wayfare.ro Domaine username and credentials
If you need to make changes to the configured VPN connection, see the pictures
2. RDC (Remote Desktop Connection)
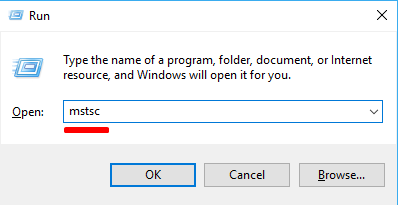
2.1 Open RDC
Open RDC from your computer by pressing Win Key and type “Remote Desktop Connection” or Win Key + R to open Run “mstsc” ( both ways will open RDC )

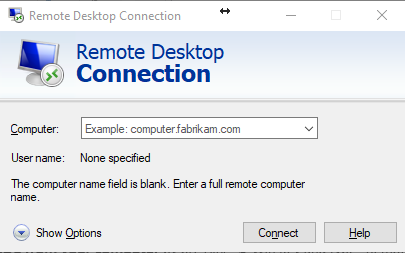

2.2 Configure
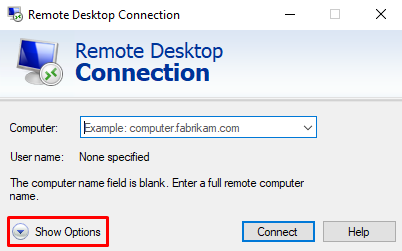
Configure your Remote Desktop Connection (Remote Desktop Protocol *.rdp file) by pressing – “Show Options”
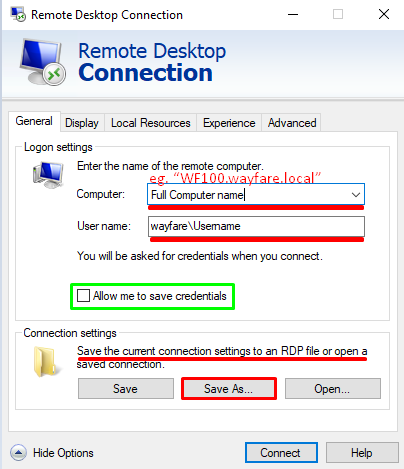
On the General tab – in the Computer field – complete with “Full Computer name” eg. “WF100.wayfare.local”
You can find your “Full Computer name” in Windows explorer – This PC – right click – Properties – “Full Computer name”.
In the User name field – complete with your domain username “wayfare\username” eg.“wayfare\WFSysAdmin”
If you’re using a personal home computer and you’re the only user who uses it you can tick “Allow me to save credentials”, this way you’ll be logged in automatically next time you click connect on the configured rdp file.
!Atention! – “Allow me to save credentials” option is not secure if you use a shared computer or you transfer the *.rdp file eg. “WFComputername.rdp” to another computer which can be accessed by multiple users.
I don’t recommend using this option, as it is better to enter your credentials each time for safety reasons.
Save As… the *.rdp configuration file on your desktop with your “WFcomputername.rdp” eg. “WF100.rdp”
You can upload your *.rdp file into One Drive or send it on your email for quick transfer and access from other Wayfare devices but be careful not to save credentials by ticking “Allow me to save credentials” on the shared connection file.
2.3 Connecting to your work station using RDP file configured
Double click on “WFcomputername.rdp” shortcut from your desktop (or where you saved it.)
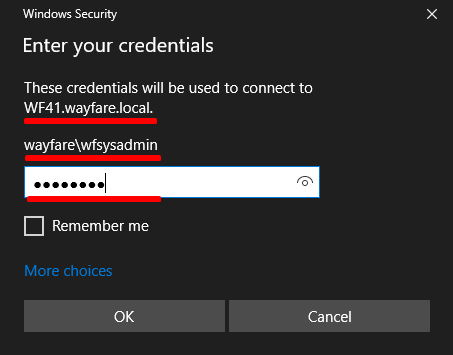
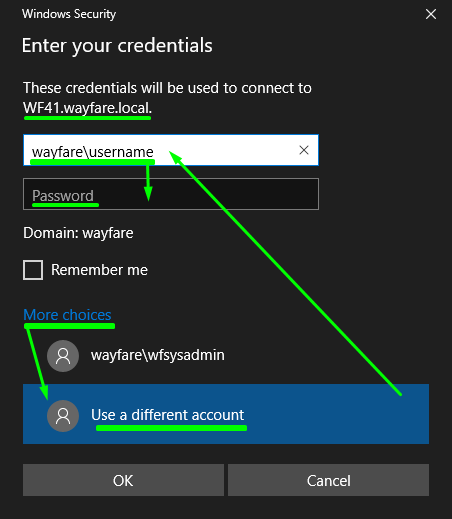
On the Remote Desktop Connection window click – “Connect” – check your domain username (or choose “More Choices” to enter your username “wayfare\username”) and enter your Password à click “Ok”.
There are two examples of connecting with the current username or changing the username
Congratulations, you should now be connected remotely to your workstation.
!Atention! – Don not tick “Remember me” box because this will save the credentials on that computer and so the credentials can become exposed to someone else with administrator right on that computer.

3. Observations
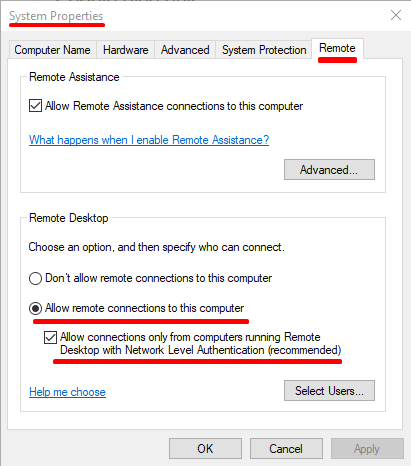
Observation no. 1
Unless you enable your RDC you won’t be able to connect remote on your workstation.
Enable RDC connections to your workstation by going to Windows Explorer – right click on “This PC” – Properties –Remote Settings – Remote tab – set your Remote Desktop settings to “Allow remote connections to this computer” and “Allow connections only from computers running Remote Desktop with Network Level Authentication (recommended)”
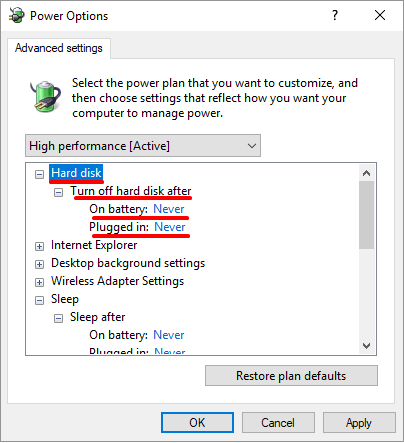
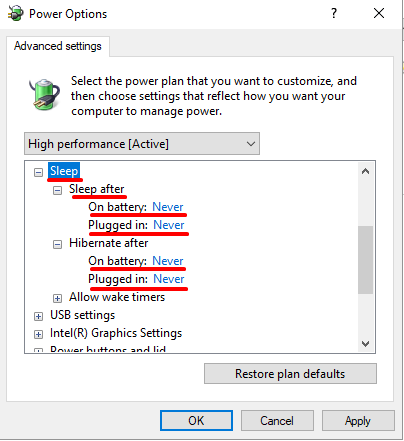
Observation no. 2
If you use VPN and Remote Desktop Connection to connect and control your workstation make sure your PC is powered on, connected to the network (preferably a cable connection) and the power settings are set to Never for “Turn off hard disk”, “Sleep” and “Hibernate” (you should also setup and proceed to restart your workstation and install Windows Updates when requested not scheduled or snoozed)
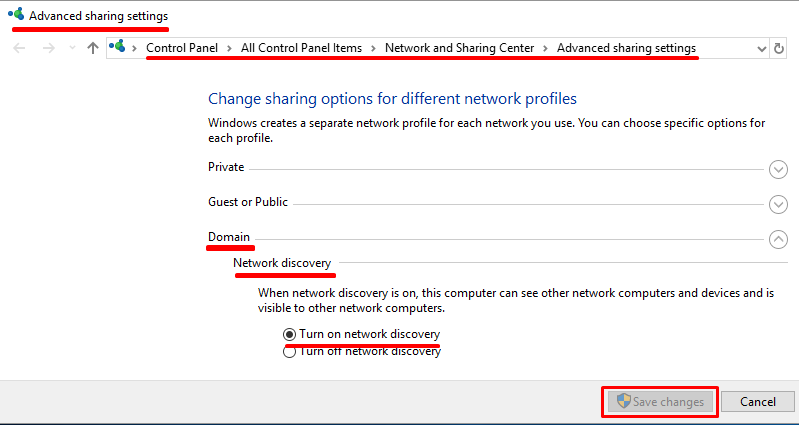
Observation no. 3
I recommend, but it is not always necessary (in cases of miss-auto-configuration network settings or network settings requiring troubleshooting) to Turn ON Network Discovery for Domain network only.